KOHLER ОРИГИНАЛНА ЧАСТ 87998 КОМПЛЕКТ ПРОМИВЕН КЛАПАН, Малък Малък Малък КОМПЛЕКТ КЛАПАН

Brand:Kohler

3.6/5

lv
102.54

Устойчив на корозия. Номерът на тоалетния резервоар може да се намери вътре в резервоара. Съвместим със следните модели тоалетни резервоари Kohler: Santa Rosa 3323, 3803, 11899, Gabrielle 3322, 14257, 14258, 14286, Kathryn-3324, 14268. Това не е универсален продукт. Kohler GENUINE Част, направена изключително за Kohler тоалетни казанчета.

Устойчив на корозия. Номерът на тоалетния резервоар може да се намери вътре в резервоара. Съвместим със следните модели тоалетни резервоари Kohler: Santa Rosa 3323, 3803, 11899, Gabrielle 3322, 14257, 14258, 14286, Kathryn-3324, 14268. Това не е универсален продукт. Kohler GENUINE Част, направена изключително за Kohler тоалетни казанчета.
Batteries Included? ‎No
Batteries Required? ‎No
Brand Kohler
Color ‎Small
Country of Origin ‎China
Customer Reviews 4.6 4.6 out of 5 stars 2,071 ratings 4.6 out of 5 stars
Inlet Connection Type Barb
Is Discontinued By Manufacturer ‎No
Item Dimensions LxWxH 10 x 4.25 x 3.75 inches
Item model number ‎87998
Item Package Quantity ‎1
Item Weight ‎7 ounces
Manufacturer ‎KOHLER
Number Of Pieces ‎1
Part Number ‎87998
Pattern ‎VALVE KIT
Product Dimensions ‎10 x 4.25 x 3.75 inches
Size ‎Small

3.6

12 Review
5 Star
76
4 Star
14
3 Star
5
2 Star
2
1 Star
3

Напишете вашето мнение

Вашият имейл няма да бъде публикуван. Всички задължителни полета са маркирани с*

Scritto da: Michael &Tulay C
Fits as should using the right part numbers
I liked the kit of the tower and gasket. I did not like the fact the instruction sheet was a different model or part and did not match how to install unit properly. Like all the rest of the reviews, the gasket going to the bottom of the tank had to be really compressed the allow turning the tower into proper position. I read some of the reviews and found this to be the same problem. After several attempts to push down and compress the gasket I gave up and found two scrap boards in my garage and put the gasket between them. I used a heavy duty C-Clamp and compressed the gasket as far as it would go. Waiting about 15 Min before releasing. During that time, I put vegetable oil on the ceramic triangle hole just the bottom of the hole not the top. After releasing the C-Clamp, I put the gasket on the tower and some vegetable oil on the three protruding stands of the tower. It slid right in and I was able to push down and turn the tower to the correct position. Worked great and saved a lot of cussing. A better instruction or correct instruction sheet should be made for this model.
Scritto da: GARY55
Use Olive Oil and A Tennis Ball for Fast and Easy Installation
To make this job a lot easier and faster do the following- Turn off the toilet water supply, flush toilet, remove remaining water with a cup and sponge. Get a small paper bowl, olive oil, leather construction gloves, and a tennis ball or baseball. The ball provides better downward pressure, leverage and grip. Not using the ball and gloves will be very painful to your hands. Remove old flush valve by pushing down and turning it counterclockwise. Remove flapper and gasket from bottom of new flush valve- before removing gasket note that the rounded beveled edge faces down to porcelain tank bottom and the sharp edge faces up to plastic side- replace in same way. Pour a little olive oil in small paper bowl and dip both sides of gasket in oil, then dip bottom of plastic flush valve where gasket was. Also put some oil on the 3 plastic clips below gasket. My toilet tank was completely dry so I also smeared some oil using my fingers on the top of the tank where gasket faces, and below the hole completely around the top where the 3 clips will be. Place new flush valve in hole at a slight right angle so it fits flush inside hole. Straddle toilet with one leg on each side of bowl close to tank and place ball in hole where flapper goes. Wearing gloves use left hand to push down hard on ball while holding lower part of flush valve tower with right hand and and turn counterclockwise while pushing down hard at same time. It takes quite a bit of downward pressure to compress gasket flat enough so that the 3 plastic clips go below hole in tank bottom. Reinstall flapper and adjust chain length. This job took me about 5 minutes to do. A plumber wanted $300 to install a $20 part. Do not use vaseline or any petroleum based lube as this can damage gasket.
Scritto da: Alan C Burnstine
OEM, but surprisingly difficult to install.
After struggling for over an hour trying to compress the gasket and twist it into place I found a YouTube video with a great suggestion. He compressed the gasket between some scrap wood using a few clamps and then put it in the freezer overnight (I only needed about 4 hours). Install within a few minutes of removing from the freezer and unclamping and it slides right into place. Give it 10 minutes to warm up and the gasket expands to normal size and becomes water-tight.
Scritto da: GEM
Installation is a real challenge
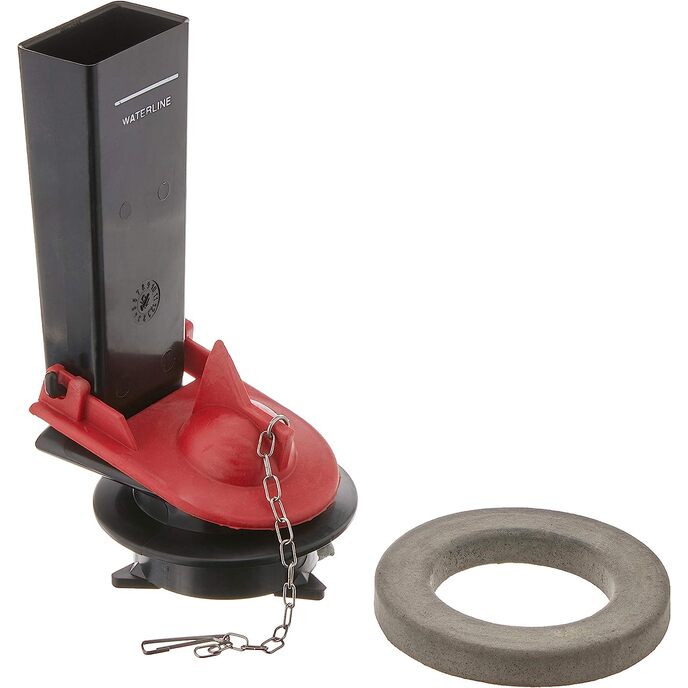
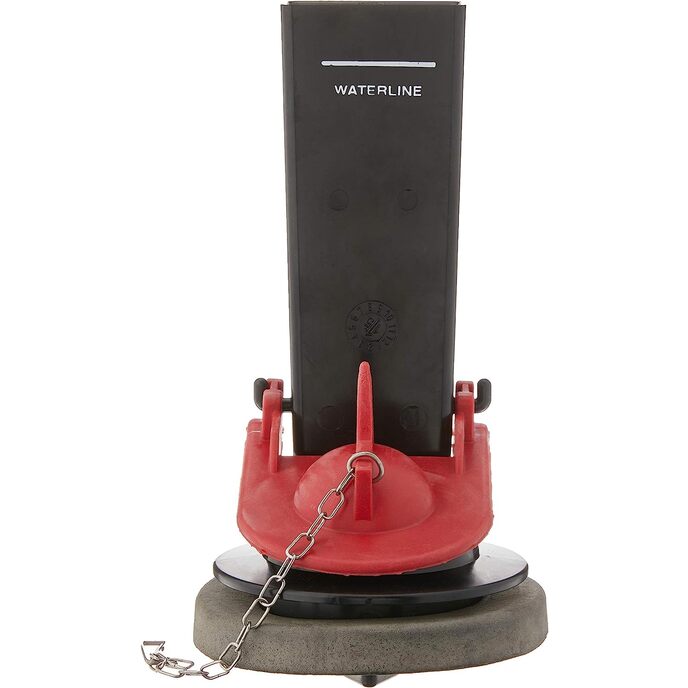
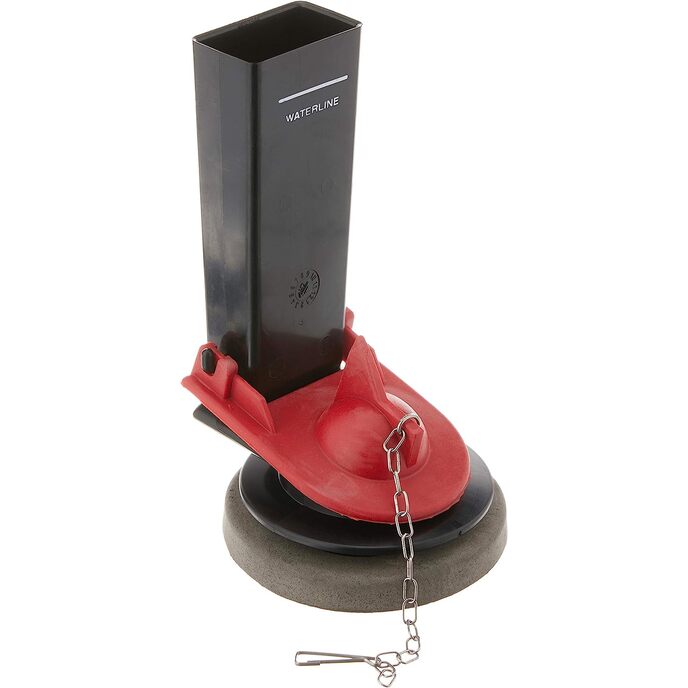
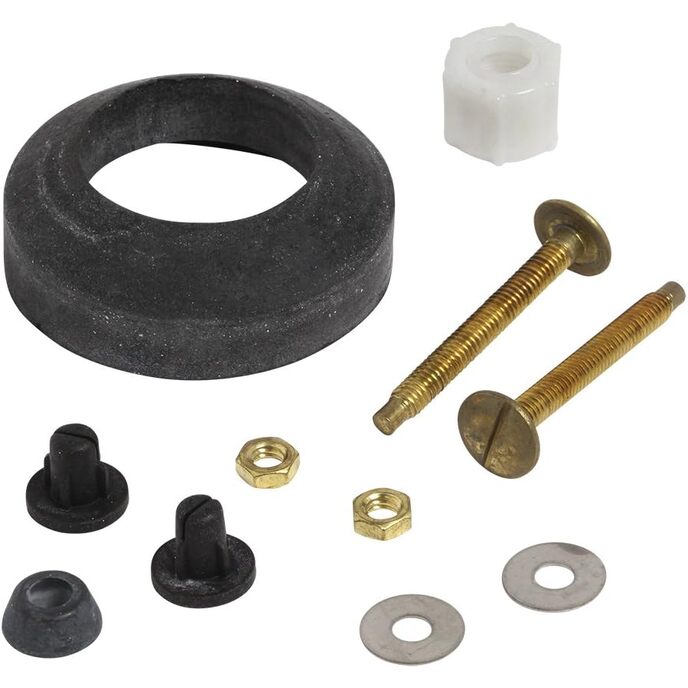
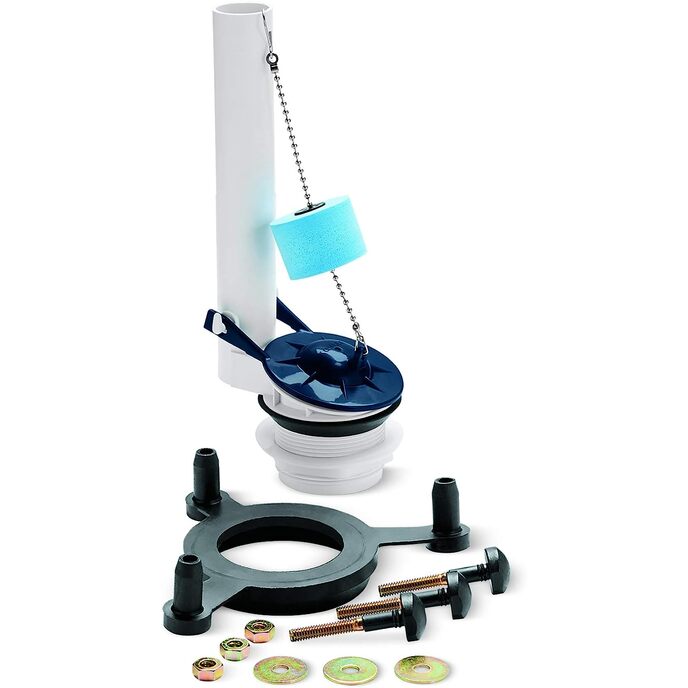
The product, once installed, is good compared to other flapper systems I've repaired in the past. I am not a plumber, but I do all my home repairs if at all possible, and I would say that I am as experienced with repairing and installing toilets, faucets, shower fixtures, water heaters, etc., as most DIYer's. I had no hesitation whatsoever in attempting to replace the Kohler flush valve kit on a Santa Rosa model toilet. The old kit came out with no problem. The new kit had me frustrated and cursing. I followed the tip of lubricating the gasket with cooking oil, and while I'm sure that is helpful, the problem I had was not related to friction; rather the gasket could not be compressed enough to allow the plastic tabs that hold the unit in place to get below the thickness of the tank. It could be that this particular model has a different thickness than some of the others that have been reviewed here. To figure out exactly what I was up against, I used a digital caliper to make some measurements. The thickness of the tank at the opening is 9/16". The thickness of the gasket is the same: 9/16". The distance from the bottom of the flush valve (the part that sits on top of the gasket) to the top of the tabs that go under the tank opening to hold to unit in place is 13/16". In order to be able to be able to install it, the gasket has to be compressed from 9/16" to less than 1/4" thick. I contacted Kohler support, armed with this information, and talked to someone who was not familiar at all with the issue. After putting me on hold for a few minutes, she came back with the recommendation to soak the gasket in hot water for 5 minutes (the complete opposite of the freezer tip read elsewhere in these reviews). It made sense to me though, and I thanked her and promised to call back if I was still having trouble. It did not work. I first used hot tap water, and that didn't make a difference in the pliability of the gasket. Then I heated water on the stove to 180 deg F, and that didn't work either. I did another web search and pulled up a review where the gasket was first compressed, then put in the freezer. That also made sense to me. So I went down to my workshop and cut two pieces of plywood just big enough to put the gasket between, protected by some butcher paper, and clamped it into my bench vise. I was really surprised at how much pressure I had to apply in order to squeeze it down to less than 1/4". The gasket really didn't want to stay compressed and in order to keep it uniformly compressed, I had to use hand clamps at each corner. I put that entire assembly into the freezer overnight (it just worked out that way), and was able to finally get it installed with about as much difficulty as the average reviewer has expressed. I lubed up the plastic part where the gasket would make contact and put the frozen gasket in place. It began thawing out and decompressing shortly after I had the tabs hooked under the tank, but not fully rotated into position, so it was still somewhat of a struggle to get it completely rotated. By the time I did, the gasket was noticeably decompressed and I was able to hook everything up and fill the tank, thankful that there were no leaks. Thanks for reading through this. I'd be interested to know if anyone else has taken a measurement of the tank bottom at the opening. Please let me know if yours measures differently than 9/16".
Scritto da: allison
Exact replacement
This was an exact replacement for the old part which was causing the toilet to leak. Installation was easy, other than having to use all my strength to twist the old part out.
Scritto da: grant mccreadie
use lots of soap
repair my toilet
Scritto da: bertrand97150
Hard to install it.
Good quality. It is difficult to install because a lot of pressure must be applied to the gasket in order to turn the mechanism.
Scritto da: A. Dac
OEM fitment. Works perfectly.
Watch a tutorial video on how to remove/install this valve. Do not lube the gasket on the base. Fits and functions perfectly.
Scritto da: Albi Aziz
Excellent product, but very difficult to install!
This is the second replacement I’ve had to do in my house, and the first toilet was easier than the second. However in both instances, the amount of force / pressure needed to compress the seal is INSANE! I weigh 155lb and trying to push this valve down to try and compress and also turning clockwise to “lock” the notches in place took 20-30min after a LOT of cursing, bruises, and anguish. Was worth it in the end but seriously, if you don’t have the strength or aren’t prepared to really REALLY put some strength into this, this isn’t for you. Just order the part and get a professional to install it for you - def what I’m doing next time! Great original product though
Scritto da: Amazon Customer
Like other said, add oil as lube so it spins and locks in place
Needed replacement after old one rotted out due to family putting chemical's in the tank. It was quite easy to install. Required a little bit of elbow grease and would only twist into place after adding oil onto bottom of seal. I recommend pressing down hard and evenly on the part with your palm first where the flange gets installed and from there rotate it in place with your other hand from the bottom part of the spout
Scritto da: M Yeung
Pricey gadget
It works and it was hard to come by as I looked for it in various plumbing store and they do not carry the stock. It is quite pricey, hoping it will last me for a long time.
Scritto da: mark minckler
Easy install, no more running toilet
Had to find a video online for this type, once I did it only took 2 minutes take out the old and install the new. No more running toilet, works great!

Свързани продукти

hot

Открийте нашата международна мрежа

Изпращаме до 28 държави, над 200 000 продукта. Бъдете в течение, абонирайте се за бюлетина.

Array